nengi Basics 1: Messages
Previous: nengi Intro 3: Code & Tour
In this tutorial we will create and send a nengi.Message. Messages are instantaneous deliveries of keys and values from the server to the client. We can create all kinds of features out of messages, but for now we're going to make a glorified (networked!) console.log.
So just to get in the habit of synchronizing our local code with the tutorial's source code in the repo, go to the appropriate folder and run git pull followed by git checkout basics-1.
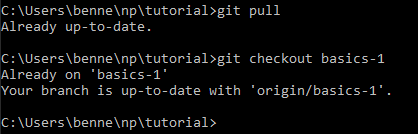
You should see something like the picture, except your folder may be called nengi-tutorials. Mine is just called tutorial and that is fine.
Start the game again if you haven't already by running npm start. You can leave it running in the background, as it is configured to autorestart as we make code changes
Defining a Message
Now open up the project and create a new file in the common folder called NetLog.js and place the following code inside:
import nengi from 'nengi'

class NetLog {
    constructor(text) {
        this.text = text
    }
}
NetLog.protocol = {
    text: nengi.String
}

export default NetLog
This simple message has one property named text that will be networked as a nengi.String whenever it is sent.
Then open up nengiConfig.js and add NetLog to the list of message protocols as follows:
import nengi from 'nengi'
import NetLog from './NetLog.js'

const config = {
    UPDATE_RATE: 20,

    ID_BINARY_TYPE: nengi.UInt16,
    TYPE_BINARY_TYPE: nengi.UInt8,

    ID_PROPERTY_NAME: 'nid',
    TYPE_PROPERTY_NAME: 'ntype',

    USE_HISTORIAN: true,
    HISTORIAN_TICKS: 40,

    protocols: {
        entities: [],
        localMessages: [],
        messages: [
            ['NetLog', NetLog]
        ],
        commands: [],
        basics: []
    }
}

export default config
Any object that is destined for the network and has a protocol attached to it must be added to nengiConfig.js including any Message, Entity, or Command. If nengi were a brain, you could think of this config as being its language center. Nengi only knows what a NetLog is if it has been added here.
Using the Message
Let's send a message to any client that connects. Open up gameServer.js, import our new message, and then send it to new clients.
import nengi from 'nengi'
import nengiConfig from '../common/nengiConfig.js'
import instanceHookAPI from './instanceHookAPI.js'
import NetLog from '../common/NetLog.js'

const instance = new nengi.Instance(nengiConfig, { port: 8079 })
instanceHookAPI(instance)

/* serverside state here */

instance.on('connect', ({ client, callback }) => {
    /* client init logic & state can go here */
    callback({ accepted: true, text: 'Welcome!' })
    instance.message(new NetLog('hello world'), client)
})

instance.on('disconnect', client => {
    // disconnected
})

/* on('Command:AnyCommand', ({ command, client }) => { }) */

const update = (delta, tick, now) => {
    instance.emitCommands()
    /* serverside logic can go here */
    instance.update()
}

export {
    update
}
So now our server will send a NetLog message to each that connects. In this case we're sending the string 'hello world' but we could've sent any string. And by changing the definition of NetLog we can send things other than strings (booleans, integers, floats, etc). We've added this code inside of the instance connect handler which is invoked whenever a new client connects. In later tutorials we'll learn how to do fancier things with this handler, such as how to create a controllable character, and how to turn away connections.
Now we've got to go to the clientside code and actually listen for this message and display it to the console.
Open up gameClient.js and handle our new message:
import nengi from 'nengi'
import nengiConfig from '../common/nengiConfig.js'
import clientHookAPI from './clientHookAPI.js'
import createHooks from './hooks/createHooks.js'
import renderer from './graphics/renderer.js'

const client = new nengi.Client(nengiConfig, 100)

const state = {
    /* clientside state can go here */
}

/* create hooks for any entity create, delete, and watch properties */
clientHookAPI(client, createHooks(state))

client.on('connected', res => { console.log('connection?:', res) })
client.on('disconnected', () => { console.log('connection closed') })

/* on('message::AnyMessage', msg => { }) */
client.on('message::NetLog', message => {
    console.log(`NetLog: ${ message.text }`)
})

client.connect('ws://localhost:8079')

const update = (delta, tick, now) => {
    client.readNetworkAndEmit()
    /* clientside logic can go here */
    renderer.update(delta)
    client.update()
}

export {
    update,
    state
}
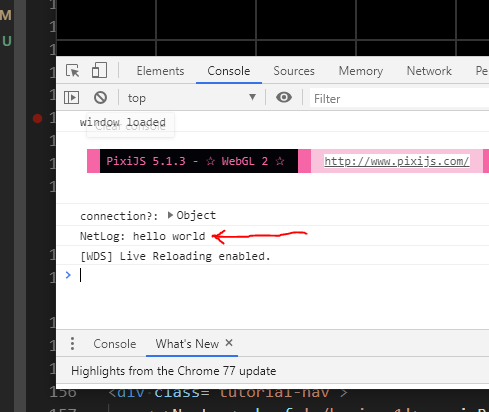
This creates a listener for any NetLog messages that come over the pipe. In this case all we do with them is log their text property to the console.
Confirm that it works by refreshing the browser running the game at http://localhost:8080
Let's summarize what we've done.
- Define a new message called
NetLog - Add
NetLogtonengiConfig.js - Create and sent a
NetLogfrom the instance'connect'handler - Listen for
'message::NetLog'on the game client - Display netLog's text in the game client's console
Though basic we've just touched on all parts of a networked feature. An action orignates from the client (opening a connection) which was processed by the server, who then added something to the game (just an outgoing message) which was received by our client.
Let's begin building towards something more advanced by adding in an entity.
Next: nengi Basics 2: Entities